Linux 主机初始化环境配置
为了方便以后迁移主机,记录下Linux主机迁移后必要的初始化操作
配置SSH免密登录
使用
powershell等等终端使用密码登录ssh1
ssh root@xx.xx.xx.xx
首次登录会出现认证确认,输入yes即可,随后输入密码。

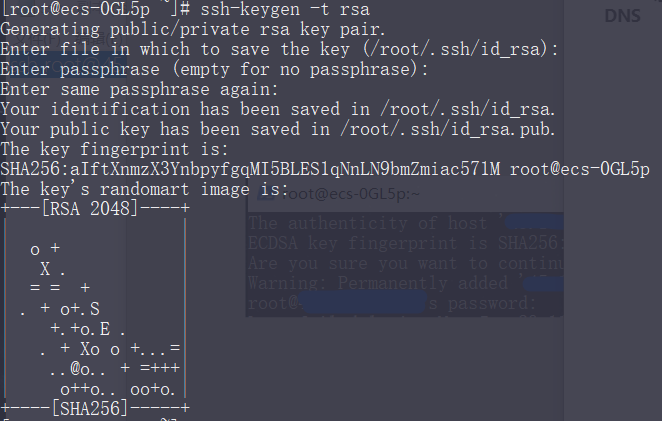
生成公钥和私钥
1
ssh-keygen -t rsa
直接按回车就行
导入公钥到认证文件,更改权限
在服务器的
/root/.ssh路径下新建authorized_keys文件,输入你控制端的公钥。Windows的ssh配置文件在C:/用户/.ssh下
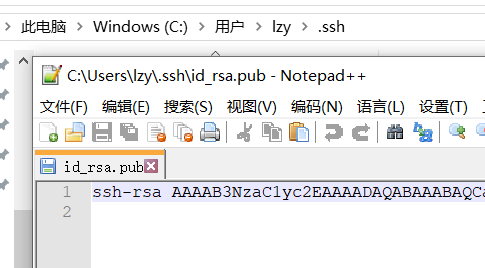
用记事本打开
id_rsa.pub,注意!一定是.pub! 注意!一定是.pub! 注意!一定是.pub!把里面的内容复制到服务器的
authorized_keys文件中更改权限(这一步非常重要!不然你配置都正确还是无法免密登录!)
1
2
3更改主机配置文件权限
chmod 700 ~/.ssh
chmod 600 ~/.ssh/authorized_keys
一键连接脚本
现在就能新建一个文本文件输入以下内容,把后缀改成
.bat(cmd)或ps1(powershell),就能够一键启动啦!1
ssh root@xx.xx.xx.xx
PS. 如果你想用更美观的
powershell启动,.ps1文件默认双击是打开编辑,只能右击运行。或者还有种办法可以曲线救国:新建一个cmd脚本,输入:
1
start powershell -c "ssh root@xx.xx.xx.xx"
就能双击用cmd启动powershell啦!(强迫症表示非常舒适
Linux 永久修改DNS
1 | vi /etc/sysconfig/network-scripts/ifcfg-eth0 |
重启生效。
查看当前DNS设置
1 | cat /etc/resolv.conf |
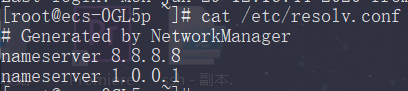
当然如果只需要临时修改DNS,直接修改vi /etc/resolv.conf也可以(重启恢复)
服务器测试脚本
ZBench
1 | wget -N --no-check-certificate https://raw.githubusercontent.com/FunctionClub/ZBench/master/ZBench-CN.sh && bash ZBench-CN.sh |
superbench
1 | wget -qO- git.io/superbench.sh | bash |
91Yun自定义测试包
安装必要程序
screen
1
yum install screen
JRE
1
yum install java-11-openjdk
Miniconda(方便配置Python3环境)
1
wget -N https://repo.anaconda.com/miniconda/Miniconda3-latest-Linux-x86_64.sh && bash Miniconda3-latest-Linux-x86_64.sh
BBR/BBR plus/锐速
1
bash <(curl -Ls https://github.com/cx9208/Linux-NetSpeed/raw/master/tcp.sh)
V2-ui1
bash <(curl -Ls https://blog.sprov.xyz/v2-ui.sh)
/etc/v2-ui
x-ui
1
bash <(curl -Ls https://raw.githubusercontent.com/vaxilu/x-ui/master/install.sh)
aria2
1
yum install aria2 -y
Web可视化界面
详见→
FileBrowser(在线文件管理)
1
curl -fsSL https://raw.githubusercontent.com/filebrowser/get/master/get.sh | bash
启动命令
1
./filebrowser -p 8009 -r /path/to/your/files
开机自启,配置service
1
2
3
4
5
6
7
8
9
10
11
12
13
14
15
16
17[Unit]
Description=Filebrowser
After=network.target
Wants=network.target
[Service]
WorkingDirectory=/root/server/fileserver
ExecStart=/usr/local/bin/filebrowser -p 8009 -r /path
Restart=on-abnormal
RestartSec=5s
KillMode=mixed
StandardOutput=null
StandardError=syslog
[Install]
WantedBy=multi-user.target-
一个功能很强大的私有网盘平台
Nginx 反代配置
为了安全起见,服务器应尽可能少开放端口。以上各种服务均可通过Nginx反向代理本地端口实现。
对于文件服务器的反代配置如下:
1 | location / { |
宝塔安装的nginx默认没有开启slice功能,因此需要手动加上--with-http_slice_module编译参数。
nginx -V查看当前nginx的编译参数,检查是否开启了--with-http_slice_module功能:
1 | > nginx -V |
若没有,则先停止nginx:
1 | systemctl stop nginx |
然后进入nginx源码目录:
1 | cd /www/server/nginx/src |
设置编译参数(把上面nginx -V 的结果复制下来,加上--with-http_slice_module)
1 | ./configure --user=www --group=www --prefix=/www/server/nginx --add-module=/www/server/nginx/src/ngx_devel_kit --add-module=/www/server/nginx/src/lua_nginx_module --add-module=/www/server/nginx/src/ngx_cache_purge --add-module=/www/server/nginx/src/nginx-sticky-module --with-openssl=/www/server/nginx/src/openssl --with-pcre=pcre-8.43 --with-http_v2_module --with-stream --with-stream_ssl_module --with-stream_ssl_preread_module --with-http_stub_status_module --with-http_ssl_module --with-http_image_filter_module --with-http_gzip_static_module --with-http_gunzip_module --with-ipv6 --with-http_sub_module --with-http_flv_module --with-http_addition_module --with-http_realip_module --with-http_mp4_module --with-ld-opt=-Wl,-E --with-cc-opt=-Wno-error --with-ld-opt=-ljemalloc --with-http_dav_module --with-http_slice_module --add-module=/www/server/nginx/src/nginx-dav-ext-module |
编译安装
1 | make && make install |
Python环境
Conda
miniconda:https://docs.conda.io/en/latest/miniconda.html#linux-installers
1 | wget https://repo.anaconda.com/miniconda/Miniconda3-py39_23.1.0-1-Linux-x86_64.sh |
换源
1 | vim ~/.condarc |
创建环境
1 | conda create -n torch1.13 python=3.9 |
Pip
换源
1 | pip config set global.index-url https://pypi.tuna.tsinghua.edu.cn/simple |